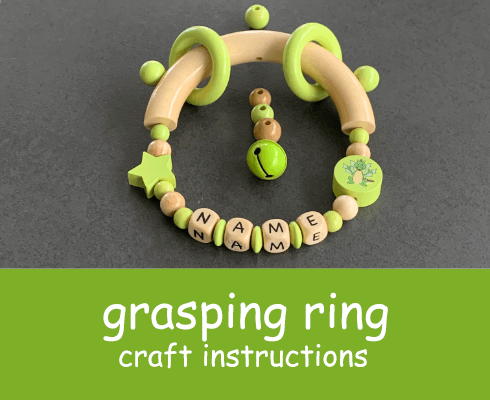
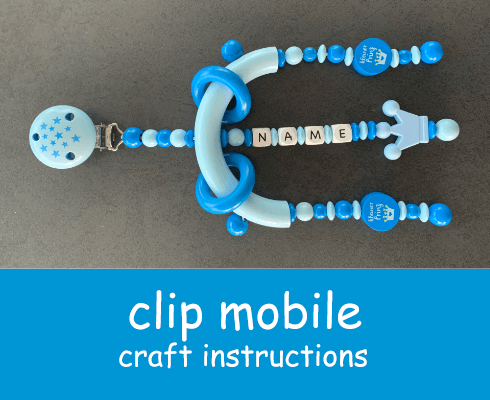
Craft instructions for a grasping ring with name
Would you like to have a unique and special grasping ring? The best thing to do is to make it yourself! Whether it's for your baby or as a gift for friends and family, it's up to you.
With our step-by-step craft instructions and with a little skill, it is wonderfully possible to make a grasping ring yourself. Thanks to our illustrated instructions, making this craft yourself is a fun experience.
Choose the wooden or silicone beads and other craft materials that you like. Then you can start with joy.
Craft accessories
- 1 half ring
- 2 wooden rings: size mini without holes
- PP polyester cord
- 3 safety beads
- Motif beads as you like, here e.g. stars and dragon
- Wooden beads
- Wooden lenses
- Letter cubes for your desired name
- 1 little bell

Step 1
It's best to sort and arrange the craft materials for your grasping ring first until it matches your ideas. Just let your imagination run wild. We always use safety beads in our DIY projects when we make dummy chains, grasping rings or name pendants. Since you can sink the knot into it, we find it more visually appealing than leaving it visible. In addition, the knot is also protected from small children's hands.

Step 2
Now take a piece of PP polyester string and melt the ends with the lighter. This will make it easier to pass it through the bead holes. First take a safety bead and string it on. Then tie a double knot at the larger hole of the safety bead. Tie the double knot with the lighter to hold the bead in place. Sink the knot completely into the hole. Depending on the design, string on more beads or pass the cord down through one of the openings in the side of the half ring.


Step 3
Now you can string bead by bead as you have arranged them. When all the wooden beads are strung, push the two mini wooden rings onto the half ring. Then string the cord through the opening at the half ring's bottom so that it comes out at the top. The grasping ring is now closed. If necessary, string the beads that should be in front of the safety bead. Tie a simple knot on the half ring or the last bead. Then string the safety bead so that the larger opening faces away from the half ring. Pull the safety bead with a little force over the simple knot you just made. This will stabilise your grasping ring. Tie a double knot into the safety bead's opening. Now pull the string as tight as possible to get the double knot into the opening of the safety bead as well as possible. When the knot is in place, you can fuse it and sink it neatly.


Step 4
Now you can make the middle bead strand. Take a piece of string and melt the ends again. String the bell onto one of the two ends of the string and push it into the middle of the piece of cord. Depending on the design, string the beads onto both ends of the cord, which should be underneath the half ring. Now push the two cord ends from below through the half ring's middle hole. String the desired beads on there as well. At the end there is another safety bead with the large opening facing upwards. Tie a double knot. Pull the string as tight as possible to get the double knot as close as possible to the hole. When the knot is in place, weld it and push it completely into the safety bead. It is important that you knot as tightly as possible so that the middle strand of bead is nice and tight.

6 Advantages of Self-Made Grasping Toys With Names
A grasping ring is a great baby accessory. Find out more about exactly why:
- Unique personalisation: As you are making the grasping ring for your baby yourself, you can also customise it to suit your wishes. You can choose the colours and various elements yourself – be it motif beads, crochet beads, bells or rings, for example. You can also personalise your grasping ring with the first name, date of birth or a matching star sign motif bead.
- Child development support: A grasping ring promotes your baby's fine motor skills and sense of touch. Your little one grasps it, bites it and feels the materials. On top of this, sounds such as the ringing of bells or the rattling of wooden rings train your baby's hearing.
- Meaningful activity: Your little one's curiosity will be aroused by your home-made grasping ring's different colours and shapes. The various sensory impressions are a valuable experience. Using a grasping ring is therefore a meaningful activity for your baby.
- Personalised gift for a birth: You have made the grasping ring with your own hands, care and love. That makes it something very special. Such a baby accessory also usually has a cute design and provides a useful activity for the child. That's why a homemade grasping ring with a name is a wonderful baby gift for a birth.
- Material suitable for children: As you make your grasping ring by hand yourself, you know its components. If you buy your craft materials from Balabi, you know that the craft materials are suitable for children: from the wooden elements such as half rings, rings and beads to the little bells.
- Beautiful childhood memory: Your self-made DIY grasping ring will accompany your baby in everyday life and during an important learning phase. As a result, it will later become an emotionally precious memento for many children and parents.